Follow these easy steps to connect and begin using your Babbl internet
To start Hitron EasyConnect Quick Setup:
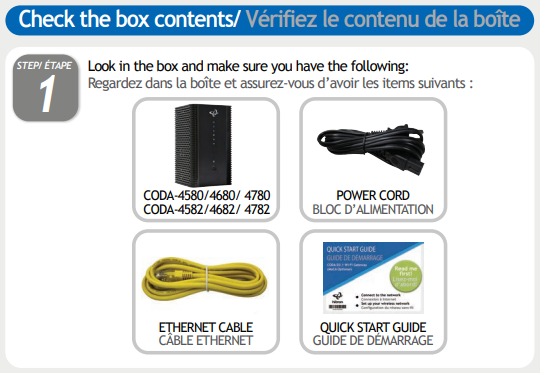
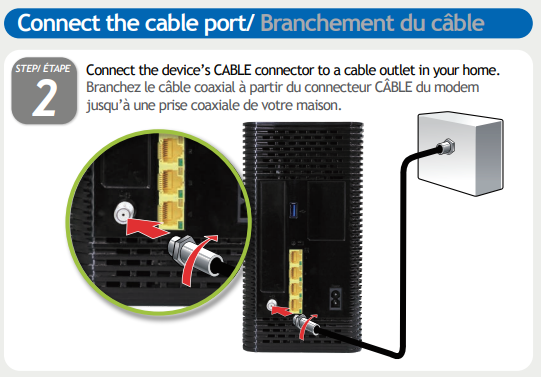
- Connect your Hitron CODA-4680 as described in the Quick Start Guide that came with your modem.
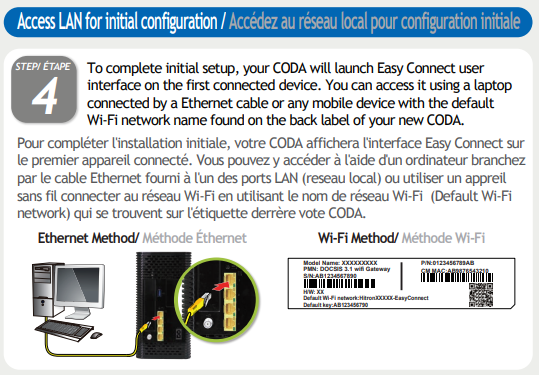
- Connect a device to the modem in one of two ways:
- Plug an ethernet cable from your device's network card to any one of the LAN ports on the back of the modem, or
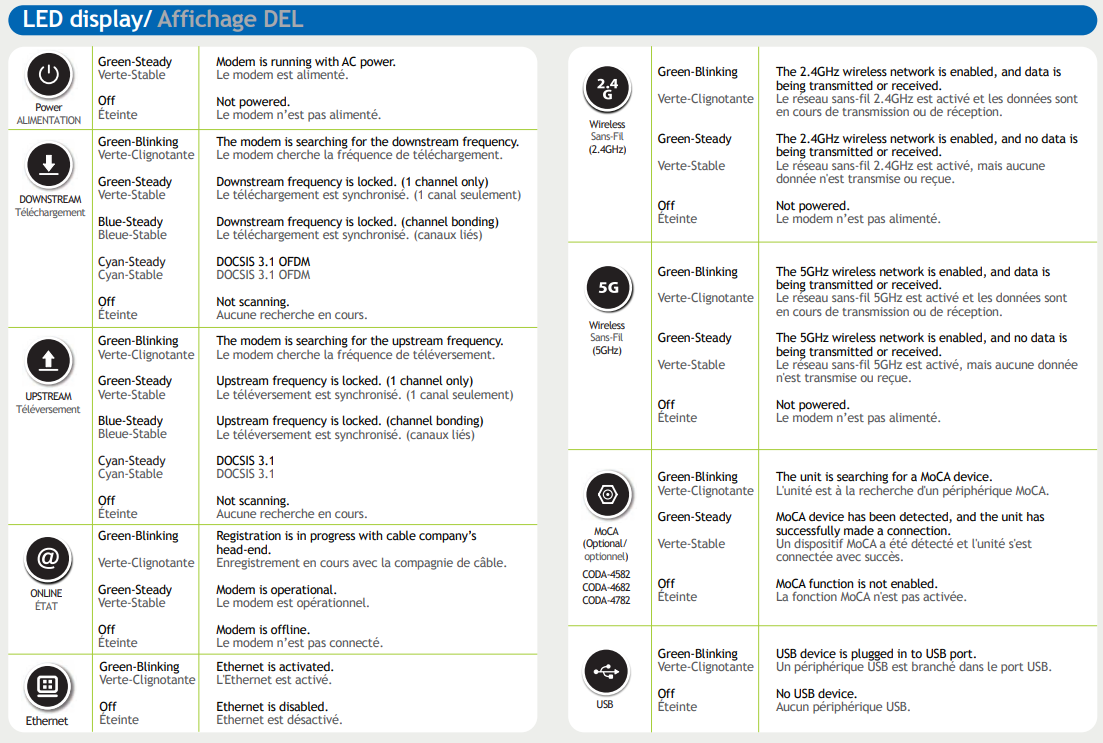
- Connect a device to the modem's EasyConnect Wi-Fi network. The EasyConnect Wi-Fi network only connects your device to the modem, it will not connect your device to the internet. The EasyConnect Wi-Fi network name and password is specific to your modem, and can be found on the label on the back of the modem. It takes the form of:
- Default Wi-Fi Network: CODAXXXXX-EasyConnect (XXXXX is a series of numbers)
- Default key: ZZZZZZZXXXXX (a series of numbers)
- Open up a web browser on the device you connected to the modem, and browse to any website.
- The Hitron EasyConnect Quick Setup screen should automatically load in your web browser. If it does not, enter 192.168.0.1 in your web browser's URL bar to load the Hitron EasyConnect Quick Setup manually.
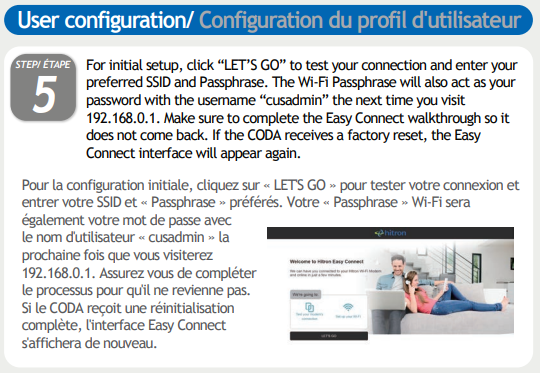
- To begin the Quick Setup, select Let's Go:

- Select Test Connection to test the modem's internet connection:

- If the test is successful, the Quick Setup will confirm that your modem is connected to the internet. Select Setup Wi-Fi to configure the Wi-Fi network name and password you wish to use. If the test is not successful, you will not be able to provide with the Quick Setup. Check the light pattern on the Hitron COD-4680, or turn it off, reconnect the coaxial cable, and try the Quick Setup again.

- Enter the Wi-Fi Network Name and Password you wish to use to connect to the internet. Re-enter the password to Confirm Password, and select Confirm Setup:

- Verify that the displayed Wi-Fi Network Name and Password are what you entered, and select Complete My Setup. If you need to make any changes, select Edit. Note that the Quick Setup will use the same Wi-Fi Network Name on both the 2.4GHz and 5GHz bands by default, and you can change these later if you wish by accessing the modem configuration pages.

- Select Close to complete the Quick Setup. If you your device is connected to the Hitron CODA-4680 via the default CODAXXXXX-EasyConnect Wi-Fi Network, disconnect your device from that network and reconnect to the Wi-Fi network you just named, using the password that you set.

- You can now access the internet using the Hitron CODA-4680.
Instructions from the box below.
What You Will Need:


NOTES:
-
Please remove all the plastic covering the vents or the unit may overheat
-
It is not advisable to lay the modem on its side due to its design, to allow proper airflow, it has to stay upright. Not only it will block 2 out of the 7 WIFI antennas but the many heat sinks are designed to dissipate heat upwards and the CODA-4x8x is constructed in a sandwich fashion, with 2 WIFI cards, the mainboard, HPNA modem and a power supply stacked on top of each other.
-
There's no 2.4Ghz antenna on the front of the modem, only 5Ghz, the other 3 sides have both antennas, so one may want to point the rear of the modem/router towards where they want the most coverage, might help with antenna diversity.